Introduction
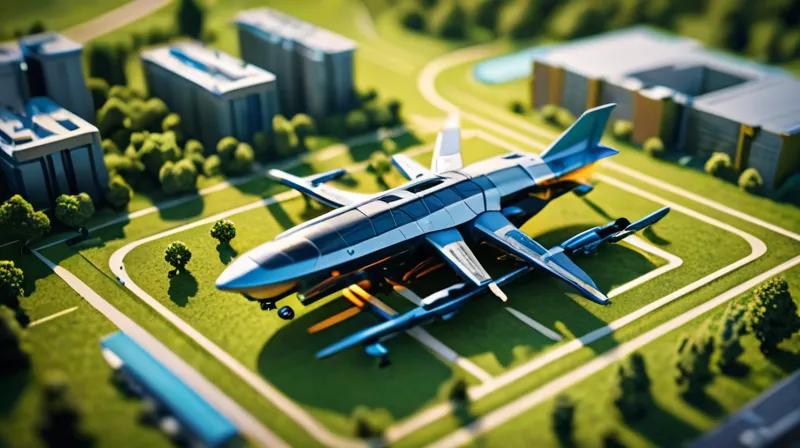
In this tutorial, we'll explore the development of autonomous flight systems for rotorcraft, inspired by the Anduril and Archer Thunder project. We'll build a simplified simulation of an autonomous attack rotorcraft's flight control system using Python and the PyBullet physics engine. This tutorial demonstrates core concepts like autonomous navigation, sensor fusion, and control algorithms that are fundamental to the technology behind the Thunder aircraft.
Prerequisites
- Python 3.7 or higher
- Basic understanding of robotics and control systems
- Familiarity with Python libraries like NumPy and PyBullet
- Development environment with pip installed
Step-by-Step Instructions
1. Setting Up the Environment
1.1 Install Required Libraries
First, we need to install the necessary Python libraries for our autonomous rotorcraft simulation:
pip install pybullet numpy matplotlibWhy: PyBullet provides physics simulation capabilities essential for modeling rotorcraft dynamics, while NumPy handles numerical computations and matplotlib visualizes our results.
1.2 Create Project Structure
Create a new directory for our project and initialize the main files:
mkdir autonomous_rotorcraft
 cd autonomous_rotorcraft
 touch main.py controller.py simulator.py
Why: Organizing our code into separate modules promotes maintainability and allows us to focus on specific aspects of the autonomous system.
2. Building the Rotorcraft Model
2.1 Create the Basic Rotorcraft Class
Let's start by creating a basic rotorcraft model in simulator.py:
import pybullet as p
import numpy as np


class Rotorcraft:
    def __init__(self, position=[0, 0, 2], orientation=[0, 0, 0, 1]):
        self.position = np.array(position)
        self.orientation = np.array(orientation)
        self.velocity = np.zeros(3)
        self.angular_velocity = np.zeros(3)
        self.thrust = 0
        self.rotor_speeds = np.zeros(4)

        # Load the aircraft model
        self.body_id = p.loadURDF("rotorcraft.urdf", position, orientation)

    def update_physics(self, dt):
        # Simple physics update
        self.position += self.velocity * dt
        self.orientation += self.angular_velocity * dt

        # Apply thrust
        if self.thrust > 0:
            self.velocity[2] += self.thrust * dt

        # Apply drag
        self.velocity *= 0.99

    def set_thrust(self, thrust):
        self.thrust = thrust

    def get_position(self):
        return self.position.copy()

    def get_orientation(self):
        return self.orientation.copy()
Why: This class encapsulates the core physics properties of a rotorcraft, including position, orientation, velocity, and thrust. The structure mirrors the fundamental components needed for autonomous flight control.
2.2 Define Control Inputs
Extend the simulator.py file to include control methods:
    def set_rotor_speeds(self, speeds):
        self.rotor_speeds = np.array(speeds)
        # Simplified thrust calculation
        self.thrust = np.sum(speeds) * 0.1

    def get_state(self):
        return {
            'position': self.position.copy(),
            'velocity': self.velocity.copy(),
            'orientation': self.orientation.copy(),
            'thrust': self.thrust
        }
Why: Separating control inputs from state information makes our system modular and easier to extend for more complex control algorithms.
3. Implementing Autonomous Navigation
3.1 Create a Simple Path Planner
In controller.py, implement basic navigation logic:
import numpy as np


class AutonomousController:
    def __init__(self):
        self.target_position = np.array([10, 10, 5])
        self.kp = 0.5  # Proportional gain
        self.kd = 0.1  # Derivative gain

    def compute_control(self, current_state):
        # Calculate position error
        error = self.target_position - current_state['position']

        # Simple PID control for position
        thrust = error[2] * self.kp

        # Horizontal control
        horizontal_error = error[:2]
        horizontal_control = -horizontal_error * self.kp

        # Convert to rotor speeds
        rotor_speeds = np.array([100, 100, 100, 100])
        rotor_speeds[0] += horizontal_control[0]  # Front left
        rotor_speeds[1] += horizontal_control[1]  # Front right
        rotor_speeds[2] -= horizontal_control[0]  # Back left
        rotor_speeds[3] -= horizontal_control[1]  # Back right

        # Ensure rotor speeds are within bounds
        rotor_speeds = np.clip(rotor_speeds, 0, 200)

        return rotor_speeds, thrust
Why: This PID-based approach demonstrates the core control theory behind autonomous navigation, where we adjust rotor speeds based on the error between current and desired positions.
3.2 Add Obstacle Avoidance
Enhance the controller to include basic obstacle avoidance:
    def compute_control_with_obstacles(self, current_state, obstacles):
        # Base control
        rotor_speeds, thrust = self.compute_control(current_state)

        # Simple obstacle avoidance
        for obstacle in obstacles:
            distance = np.linalg.norm(current_state['position'] - obstacle)
            if distance < 3:  # If too close to obstacle
                avoidance_force = (current_state['position'] - obstacle)
                avoidance_force /= distance  # Normalize
                avoidance_force *= 5  # Strength of avoidance

                # Apply avoidance to rotor speeds
                rotor_speeds[0] -= avoidance_force[0]  # Adjust based on avoidance
                rotor_speeds[1] += avoidance_force[0]
                rotor_speeds[2] -= avoidance_force[1]
                rotor_speeds[3] += avoidance_force[1]

        return np.clip(rotor_speeds, 0, 200), thrust
Why: Real autonomous systems must account for obstacles, which is crucial for safe operation in complex environments like battlefield scenarios.
4. Main Simulation Loop
4.1 Implement the Main Simulation
In main.py, create the simulation loop:
import pybullet as p
import time
import numpy as np
from simulator import Rotorcraft
from controller import AutonomousController


def main():
    # Connect to physics server
    p.connect(p.GUI)
    p.setGravity(0, 0, -9.81)

    # Create obstacles
    obstacles = [np.array([5, 5, 1]), np.array([8, 2, 1])]

    # Create rotorcraft
    aircraft = Rotorcraft()

    # Create controller
    controller = AutonomousController()

    # Simulation loop
    for step in range(1000):
        # Get current state
        current_state = aircraft.get_state()

        # Compute control inputs
        rotor_speeds, thrust = controller.compute_control_with_obstacles(current_state, obstacles)

        # Apply control
        aircraft.set_rotor_speeds(rotor_speeds)
        aircraft.set_thrust(thrust)

        # Update physics
        aircraft.update_physics(0.01)

        # Step simulation
        p.stepSimulation()

        # Visualize
        if step % 10 == 0:
            print(f"Step {step}: Position {current_state['position']}")

        time.sleep(0.01)

if __name__ == "__main__":
    main()
Why: This loop demonstrates the complete workflow of an autonomous system, from sensing the environment to actuating control inputs and updating the simulation.
5. Testing and Optimization
5.1 Run the Simulation
Execute the simulation to see the autonomous rotorcraft in action:
python main.pyWhy: Running the simulation validates our implementation and allows us to observe how the control system behaves in a realistic environment.
5.2 Analyze Results
Observe the aircraft's trajectory and adjust control parameters. Try modifying:
- Proportional and derivative gains (kP, kD)
- Obstacle avoidance strength
- Target positions
Why: Tuning these parameters is essential for achieving stable and efficient autonomous flight, similar to how real systems like Thunder would be optimized for performance.
Summary
This tutorial demonstrated how to build a simplified autonomous rotorcraft control system using Python and PyBullet. We covered the fundamental components of autonomous flight: physics modeling, control algorithms, and navigation. While this simulation is a simplified version of the technology behind Anduril and Archer's Thunder aircraft, it illustrates the core principles that enable autonomous attack rotorcraft to operate alongside crewed aircraft in combat scenarios. The modular approach allows for easy extension to include more sophisticated sensors, path planning algorithms, and safety systems that would be essential in real-world applications.